Skip to content

Bottom footer navbar button extend

Solved Customisation
32 2 15.4k 1
  • hell yeah 😉
    Simple to modify ?

    Example: put the button on the left or right

    wrote on last edited by
    #11

    @DownPW said in Bottom footer navbar button extend:

    Example: put the button on the left or right

    Looks better on the left I think - more natural

    6ab4dc12-17f0-4c64-b3c3-af2ba7e6cf6d-image.png

  • @DownPW said in Bottom footer navbar button extend:

    Example: put the button on the left or right

    Looks better on the left I think - more natural

    6ab4dc12-17f0-4c64-b3c3-af2ba7e6cf6d-image.png

    wrote on last edited by
    #12
  • wrote on last edited by
    #13

    @DownPW I’ll make some small adjustments to the final code to accommodate this. Just need to write the session cookie data, then I’ll release the code.

  • wrote on last edited by
    #14

    @DownPW Can you let me know if you used the same code for the footer as what is here ? I think this is the case, but want to check. There needs to be some modifications to this code to support the footer toggle.

  • wrote on last edited by
    #15

    Updated position of collapse/expand so it’s on the left for a more natural feel

  • wrote on last edited by
    #16

    Very great 😉

  • @DownPW Can you let me know if you used the same code for the footer as what is here ? I think this is the case, but want to check. There needs to be some modifications to this code to support the footer toggle.

    wrote on last edited by
    #17

    @phenomlab said in Bottom footer navbar button extend:

    Can you let me know if you used the same code for the footer as what is here ?

    yes Mark, with minor adjustement.

  • wrote on last edited by phenomlab
    #18

    Instructions

    1. Go to /admin/extend/widgets and locate the “Global Footer” widget
    2. At the very top of the existing code you have in that widget, add

    <div id="console-nav-tab"><i class="fa-solid fa-angles-left"></i></div>

    1. Add this CSS
    div#console-nav-tab {
    position: fixed;
        bottom: 0px;
        z-index: 900;
        height: 30px;
        left: 0px;
    }
    div#console-nav-tab i {
        font-size: 16px;
        margin-left: 10px;
        line-height: 2.0 !important;
    }
    .toBottom {
       bottom: 0px !important;
    }
    

    Note, that you probably need to modify the existing CSS ID floatleft to accommodate the additional DIV and icon. For example

    #floatleft {
        float: left;
        padding-left: 30px; /*additional left padding to support additional DIV and icon */
        font-size: 80%;
        line-height: 2.0;
        font-weight: 600;
        display: flex;
    }
    
    1. Go to /admin/appearance/customise#custom-js and add this block of code (bottom is fine, or wherever you want to place it)
    $(document).ready(function() {
        $(window).on('action:ajaxify.end', function(data) {
            var getState = localStorage.getItem("footer");
            if (getState === "hidden") {
                $("#console-nav-footer").hide();
                $("#console-nav-tab i").addClass("fa-solid fa-angles-right");
                $('.pagination-block').addClass("toBottom");
            } else {
                $("#console-nav-tab i").addClass("fa-solid fa-angles-left");
                $('.pagination-block').removeClass("toBottom");
            }
            $("#console-nav-tab").click(function() {
                $("#console-nav-footer").toggle(250, function() {
                    if ($("#console-nav-footer").is(":hidden")) {
                        localStorage.setItem("footer", "hidden");
                        $("#console-nav-tab i").addClass("fa-solid fa-angles-right");
                        $('.pagination-block').addClass("toBottom");
                    } else {
                        localStorage.setItem("footer", "shown");
                        $("#console-nav-tab i").addClass("fa-solid fa-angles-left");
                        $('.pagination-block').removeClass("toBottom");
                    }
                });
                $("i", this).toggleClass("fa-solid fa-angles-left fa-solid fa-angles-right");
            });
        });
    });
    
    1. Test, and make necessary modifications to suit your own environment
  • wrote on last edited by
    #19

    why deleted ?

  • why deleted ?

    wrote on last edited by
    #20

    @DownPW Because it’s not finished. I forgot the session state…

  • wrote on last edited by DownPW
    #21

    ha oki lol 😉

    another request but if it’s not possible, it does not matter 🙂

    Can we imagine when the footerbar is reduced, we descend the pagination block automatically ?

    ee0d46da-1589-4b66-8dd5-68fe63f80b82-image.png

    it would be cleaner. what do you think ?

  • ha oki lol 😉

    another request but if it’s not possible, it does not matter 🙂

    Can we imagine when the footerbar is reduced, we descend the pagination block automatically ?

    ee0d46da-1589-4b66-8dd5-68fe63f80b82-image.png

    it would be cleaner. what do you think ?

    wrote on last edited by phenomlab
    #22

    @DownPW that should be possible, yes. Leave it with me

  • wrote on last edited by phenomlab
    #23

    @DownPW instructions restored

    Fixed:

    • Footer does not collapse correctly on reload
    • Record session state in session, and not cookies (mostly because cookies can be disabled)
    • Pagination bar drops to fill missing footer on collapse
    • Correct icon direction displayed when expanding and collapsing

    Let me know how you get on.

    Note that there may be some cosmetic issues on mobile devices, which I will work through if necessary. In some cases it’s actually better to hide the footer altogether on mobile because of the screen estate.

    Here’s what it looks like

  • phenomlab phenomlab has marked this topic as solved on
  • wrote on last edited by
    #24

    @phenomlab

    Very good job Mark 😉

    –> I may have done something wrong but everything is ok except the pagination block which does not go down automatically.

    An idea ?

  • @phenomlab

    Very good job Mark 😉

    –> I may have done something wrong but everything is ok except the pagination block which does not go down automatically.

    An idea ?

    wrote on last edited by
    #25

    @DownPW not sure without checking, but I’ll have a look later

  • wrote on last edited by DownPW
    #26

    @phenomlab

    I have check and see my error 🙂

    Oh my god, it’s beautiful mark 😉

  • @phenomlab

    I have check and see my error 🙂

    Oh my god, it’s beautiful mark 😉

    wrote on last edited by
    #27

    @DownPW great ! Post a video so we can see how it looks outside of Sudonix 👍

  • @DownPW great ! Post a video so we can see how it looks outside of Sudonix 👍

    wrote on last edited by
    #28

    @phenomlab What tools you use ?

  • @phenomlab What tools you use ?

    wrote on last edited by
    #29

    @DownPW one of the many freely available screen recorders for chrome (extensions). Nothing fancy.

  • wrote on last edited by
    #30

    @phenomlab said in Bottom footer navbar button extend:

    @DownPW great ! Post a video so we can see how it looks outside of Sudonix 👍
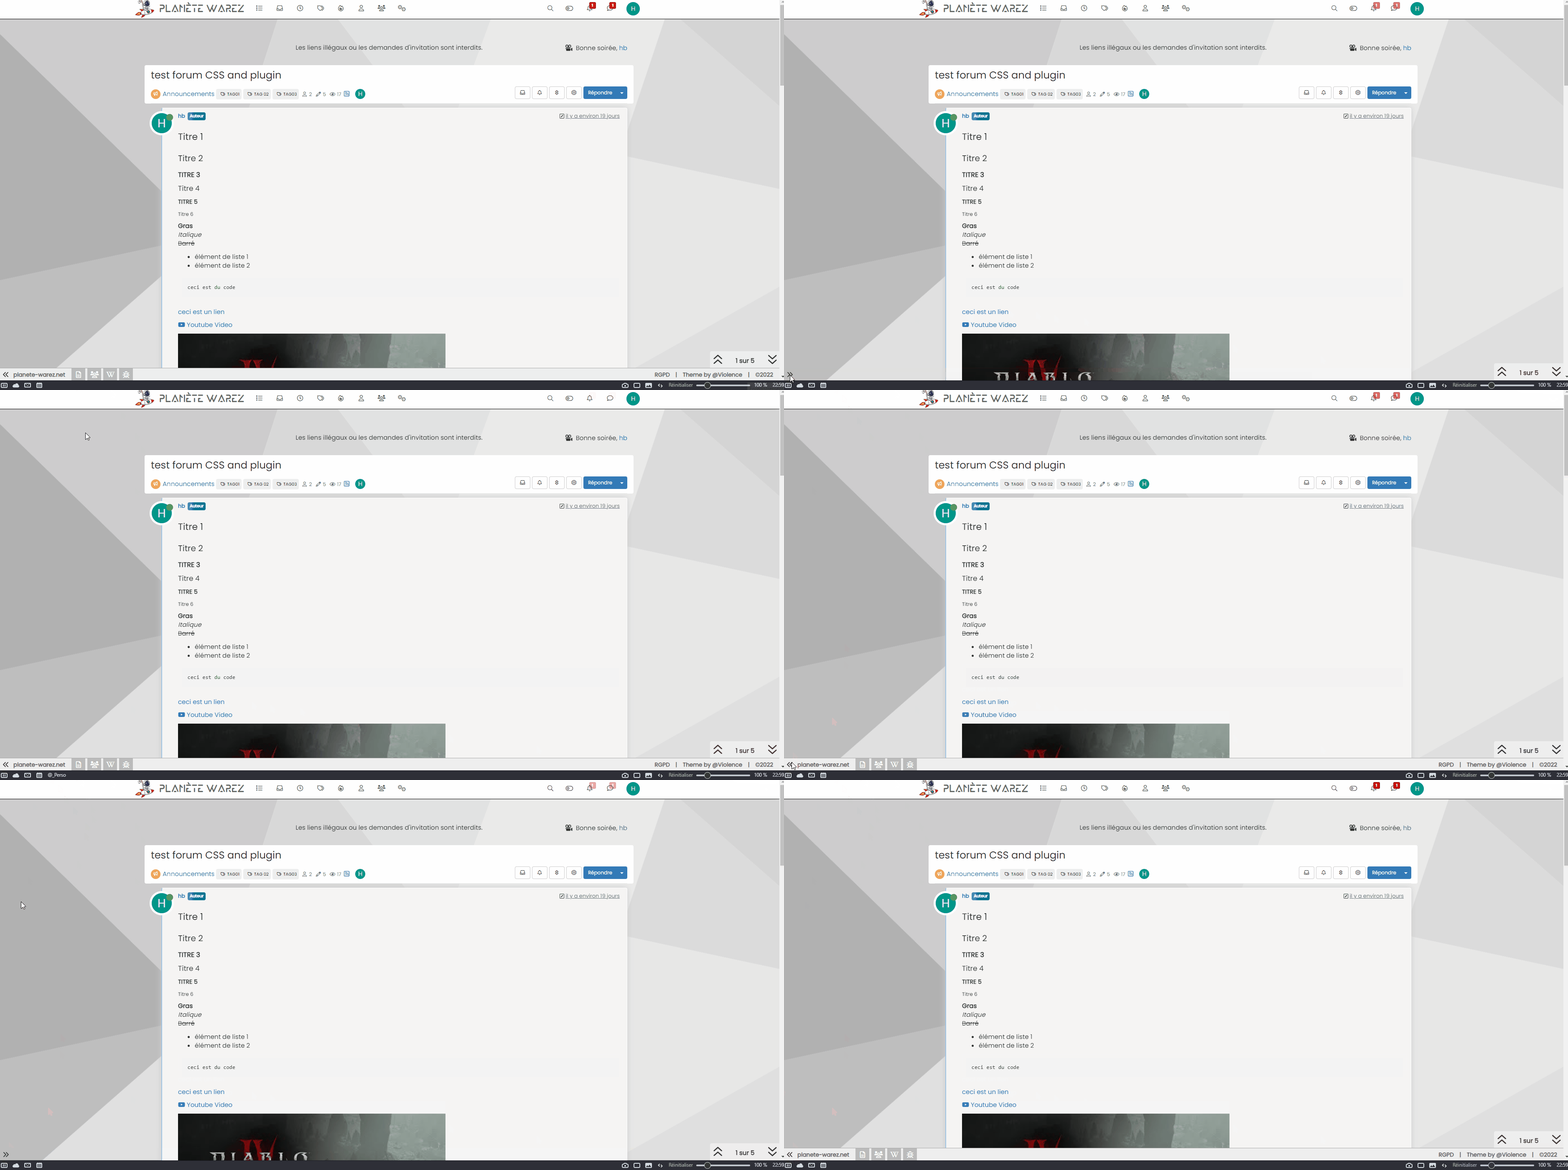
    Animation.gif


Did this solution help you?
Did you find the suggested solution useful? Support 💗 Sudonix with a coffee ☕
If your organisation needs deeper expertise around infrastructure, security, or technology leadership, learn more about Phenomlab Ltd. Many of the deeper technical guides behind Sudonix are published there.

Related Topics
  • navbar

    Solved Customisation navbar harmony
    2
    2 Votes
    2 Posts
    1k Views
    phenomlab
    Marking as resolved, based on https://community.nodebb.org/topic/18625/navbar/2
  • nodebb-user-level customisation : popover element

    Solved Customisation css user level plugin custom
    15
    6 Votes
    15 Posts
    5k Views
    DownPW
    No no, I said that in the sense that he told me it was simple ^^ I was able to see that this was not the case by targeting the elements he had advised me.
  • hover link effect

    Solved Customisation css link hover
    18
    1
    6 Votes
    18 Posts
    7k Views
    phenomlab
    @DownPW Looking at the underlying code, class start is being added on hover by jQuery in this function document.querySelectorAll(".button-gradient, .button-transparent").forEach((button) => { const style = getComputedStyle(button); const lines = document.createElement("div"); lines.classList.add("lines"); const groupTop = document.createElement("div"); const groupBottom = document.createElement("div"); const svg = createSVG( button.offsetWidth, button.offsetHeight, parseInt(style.borderRadius, 10) ); groupTop.appendChild(svg); groupTop.appendChild(svg.cloneNode(true)); groupTop.appendChild(svg.cloneNode(true)); groupTop.appendChild(svg.cloneNode(true)); groupBottom.appendChild(svg.cloneNode(true)); groupBottom.appendChild(svg.cloneNode(true)); groupBottom.appendChild(svg.cloneNode(true)); groupBottom.appendChild(svg.cloneNode(true)); lines.appendChild(groupTop); lines.appendChild(groupBottom); button.appendChild(lines); button.addEventListener("pointerenter", () => { button.classList.add("start"); }); svg.addEventListener("animationend", () => { button.classList.remove("start"); }); }); }) The CSS for start is below .button-gradient.start .lines svg, .button-transparent.start .lines svg { animation: stroke 0.3s linear; } And this is the corresponding keyframe @keyframes stroke { 30%, 55% { opacity: 1; } 100% { stroke-dashoffset: 5; opacity: 0; } } It’s using both CSS and SVG, so might not be a simple affair to replicate without the SVG files.
  • Quote design CSS

    Solved Customisation css quote
    15
    1
    4 Votes
    15 Posts
    6k Views
    phenomlab
    @DownPW yes, that does make sense actually. I forgot to mention the layout of Sudonix is custom so that would have an impact on the positioning. Good spot
  • 5 Votes
    9 Posts
    6k Views
    DownPW
    @phenomlab Very very great Mark Thanks again, It’s perfect now ! –> I share my code that I modified. I’ve added French and English comments. If you see things to change Mark, don’t hesitate. As usual, all the access paths (FA icons, logo) will have to be modified according to your architecture. You can also very well add/remove time slots and change welcome messages to suit your needs. Widgets ACP/HTML Widget Footer Logo <center> <br><br> <img id="thislogo" src="path/to/my/image"> </center> Widget Welcome Message <!-- IF loggedIn --> <div class="getUsername">, <a href="/me"><span class="username"></span></a></div> <!-- ENDIF loggedIn --> CSS – I added the size font-weight: 900; in the CSS because otherwise some FA icon wasn’t displayed correctly and reduce margin : i#thisicon { font-family: "Font Awesome 5 Free"; font-style: normal; margin-right: 8px; font-weight: 900; } .getUsername { padding-top: 20px; text-align: right; } /*Smartphone*/ /*On désactive le message de bienvenue"*/ /*We disable the welcome message"*/ @media all and (max-width: 1024px) { .getUsername { display: none; } } JAVASCRIPT // ------------------------------------------ // Welcome Message avec icône et Footer logo // Welcome Message with icon and Footer logo // ------------------------------------------ $(window).on('action:ajaxify.end', function (data) { //On récupère le username dans le DOM et on l'affiche //We retrieve the username from the DOM and display it function updateUsername() { $('.getUsername .username').text(app.user.username); } if (document.readyState === 'loading') { document.addEventListener('DOMContentLoaded', updateUsername); } else { updateUsername(); } //On déclare les variables principales (themessage & thehours) ainsi que les variables secondaires correspondants aux plages horaires //We declare the main variables (themessage & thehours) as well as the secondary variables corresponding to the time slots var thehours = new Date().getHours(); var themessage; var wakeup = ('Good day'); var morning = ('Good morning'); var lunch = ('Bon appétit'); var afternoon = ('Good afternoon'); var drink = ('Cheers'); var evening = ('Good evening'); var night = ('Good night'); var welcome = ('Welcome'); var matched = false; //On peux ici tester le résultat du code en spécifiant une heure (!!!IMPORTANT: Commenter une fois le script testé!!!) //Here we can test the result of the code by specifying a time (!!!IMPORTANT: Comment once the script has been tested!!!) //thehours = 20 //On déclare les plages horaires avec les icones FA et les logos //We declare the time slots with FA icons and logos path if (thehours >= 0 && thehours < 6) { themessage = night; theicon = "fa-solid fa-moon"; thelogo = "/assets/customlogo/XXX.png"; } else if (thehours >= 6 && thehours < 8) { themessage = wakeup; theicon = "fa-solid fa-mug-hot"; thelogo = "/assets/customlogo/XXX.png"; } else if (thehours >= 8 && thehours < 12) { themessage = morning; theicon = "fa-solid fa-sun"; thelogo = "/assets/customlogo/XXX.png"; } else if (thehours >= 12 && thehours < 13) { themessage = lunch; theicon = "fas fa-hamburger"; thelogo = "/assets/customlogo/XXX.png"; } else if (thehours >= 13 && thehours < 16) { themessage = afternoon; theicon = "fa-solid fa-sun"; thelogo = "/assets/customlogo/XXX.png"; } else if (thehours >= 16 && thehours < 18) { themessage = welcome; theicon = "fa-solid fa-rocket"; thelogo = "/assets/customlogo/XXX.png"; } else if (thehours >= 18 && thehours < 19) { themessage = drink; theicon = "fa-solid fa-wine-glass"; thelogo = "/assets/customlogo/XXX.png"; } else if (thehours >= 19 && thehours < 20) { themessage = lunch; theicon = "fas fa-pizza-slice"; thelogo = "/assets/customlogo/XXX.png"; } else if (thehours >= 20 && thehours < 24) { themessage = evening; theicon = "fa-solid fa-tv"; thelogo = "/assets/customlogo/XXX.png"; } // Si la page active est un topic, on désactive/cache le message de bienvenue // If the active page is a topic, we deactivate/hide the welcome message if (window.location.href.indexOf("topic") > -1) { console.log("This is a topic, so hide the user welcome message"); $('#thisuser').hide(); } // Sinon, on affiche le message en fonction, l'icone FA et son emplacement (prepend) // Otherwise, we display the message in function, the FA icon and its location (prepend) else { $('.getUsername').prepend("<i id='thisicon' class='" + theicon + "'></i>" + themessage); $("#thislogo").attr("src", thelogo); //$('.getUsername').prepend("<img id='thisicon' src='" + thelogo + "'></>" + themessage); } });
  • [NodeBB] Import custom Font

    Solved Customisation custom fonts nodebb css
    12
    3 Votes
    12 Posts
    5k Views
    phenomlab
    @cagatay you’ll need to define this in the body tag (or another element if you want greater or more granular targets) - for example body { font-family: "Poppins"; font-size: 16px; } Essentially, you use the font-size CSS directive.
  • Multiple link on one ico non Navbar

    Solved Customisation links css navbar
    7
    1
    2 Votes
    7 Posts
    3k Views
    DownPW
    yeah you’re right @phenomlab. Problem of NodeBB Version
  • Discourse Design Change

    Customisation design change css html
    25
    7 Votes
    25 Posts
    10k Views
    RiekMedia
    @phenomlab okay